

How To Install Maven In Eclipse Mars
This tutorial describes the usage of Maven within the Eclipse IDE for building Java applications.
i. Using Maven with the Eclipse IDE
The Eclipse IDE provides support for the Maven build. This back up is adult in the M2Eclipse projection.
It provides an editor for modifying the pom file and downloads dependencies if required. Information technology also manages the classpath of the projects in the IDE. Yous can as well employ wizards to import existing Maven projects and to create new Maven projects.
ii. Installation and configuration of Maven for Eclipse
2.1. Installation of the Maven tooling for the Eclipse IDE
Most Eclipse IDE downloads already include support for the Maven build arrangement. To cheque, use and check if you tin can run into the Maven logo (with the M2E) sign.

If Maven support is not nevertheless installed, the following description can be used to install it.
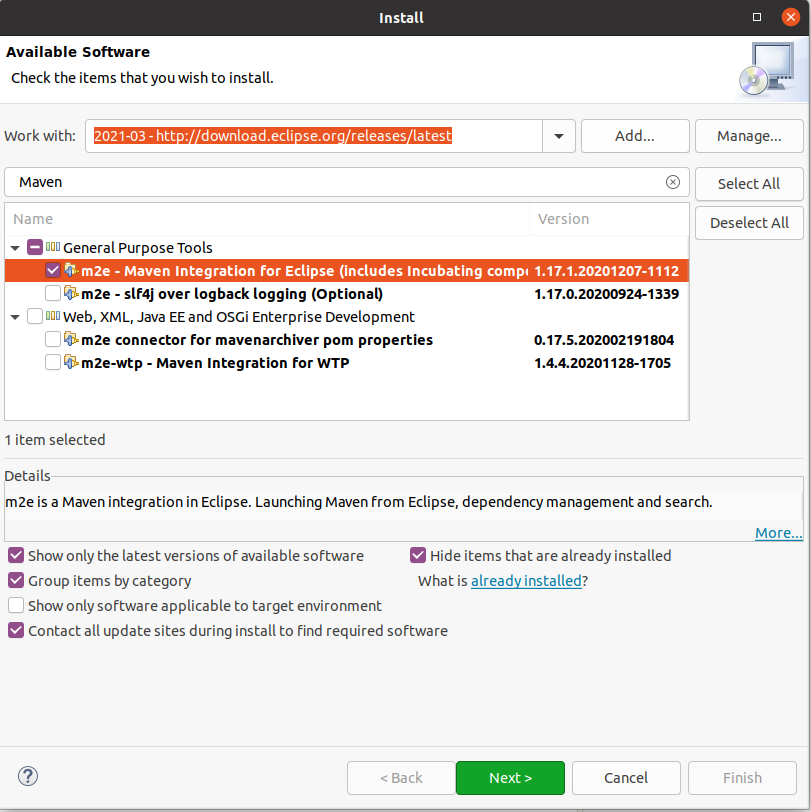
Installation of Maven back up into the Eclipse IDE
To install Maven support, select the carte entry. To utilize the latest release, enter the following URL in the Works with field.
http://download.eclipse.org/releases/latest For the usage of Maven for Coffee projects, you simply need the m2e component.
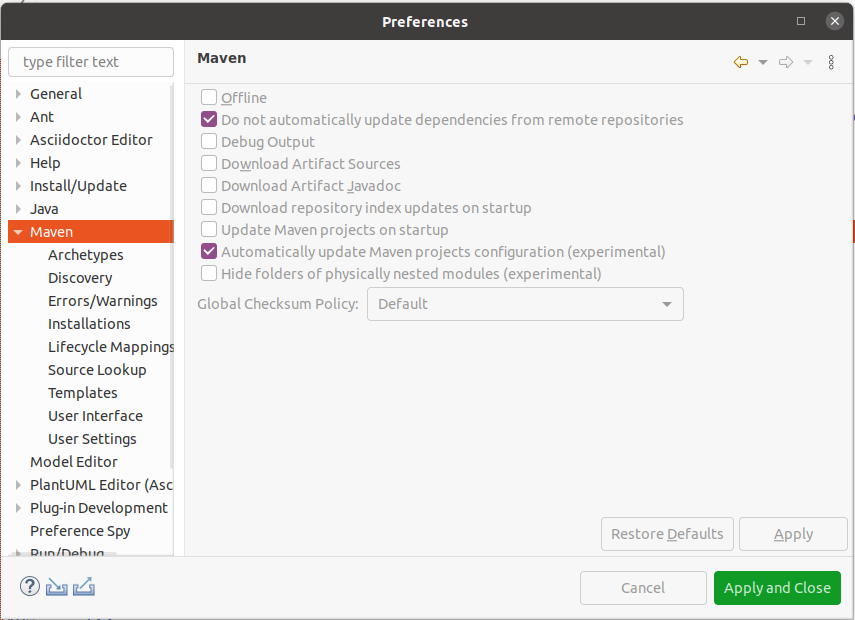
2.ii. Configure automatically updates of Maven dependencies
In nearly cases it is useful if changes in the Maven configuration automatically updates the project settings.
Therefore, et the Automatically update Maven projects configuration flag nether .
3. Practise: Create a new Maven project via the Eclipse IDE
In this exercise yous learn how to create a new Maven project with the Eclips IDE.
3.1. Create Maven projection
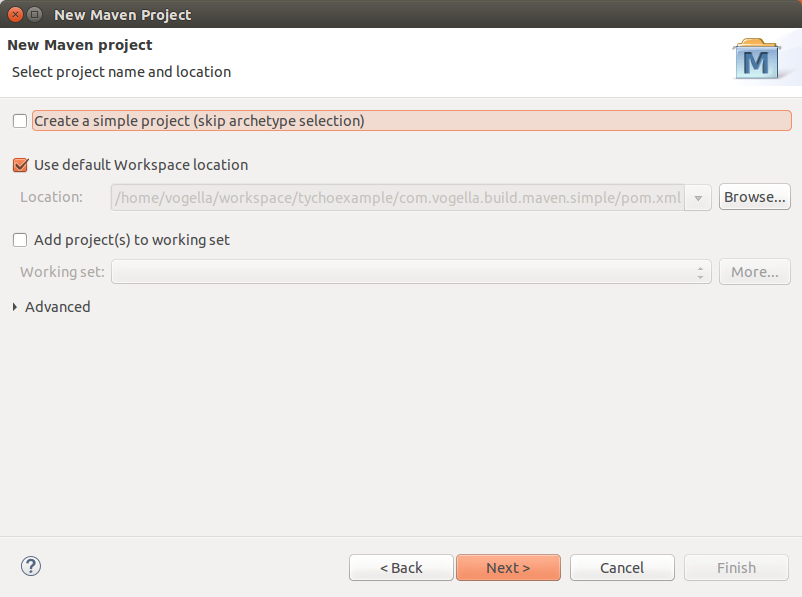
Create a new Maven project via .
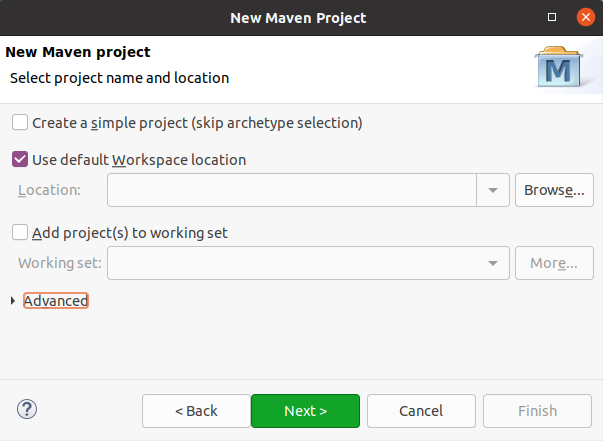
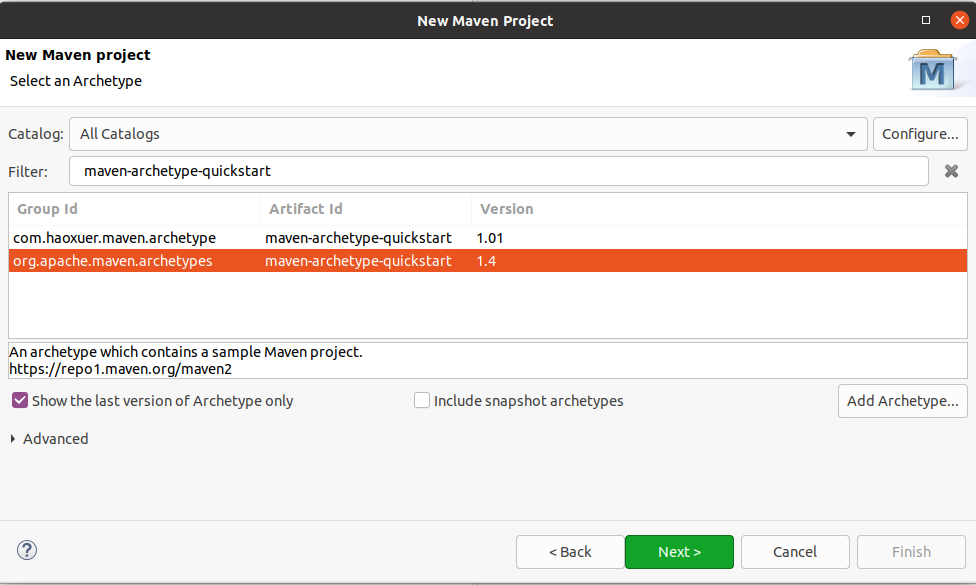
On the offset wizard page, you tin select if you want to create a uncomplicated project. In this instance you skip the archetype choice. In this exercise nosotros want to use an archetype equally template for our project creation.
Printing next, filter for the "maven-archetype-quickstart" archetype and select the entry with the apache group. This is the classical Maven example archetype for project cosmos.
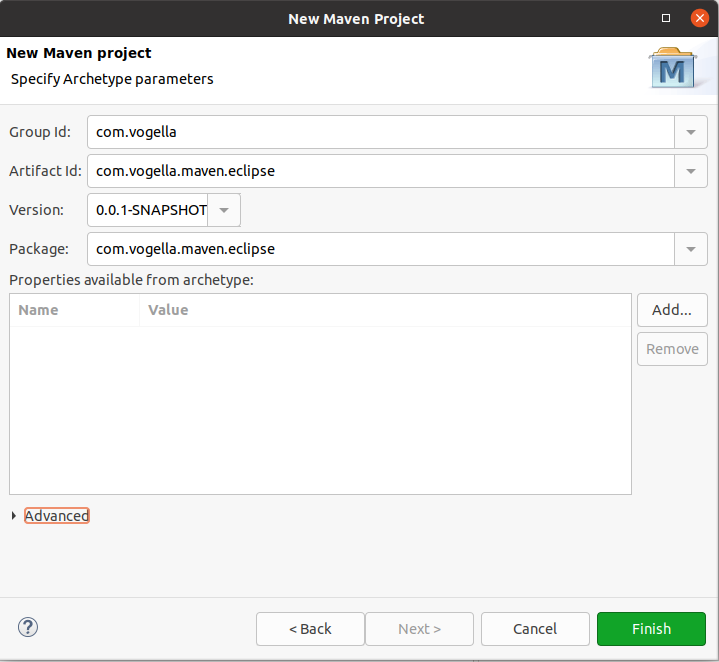
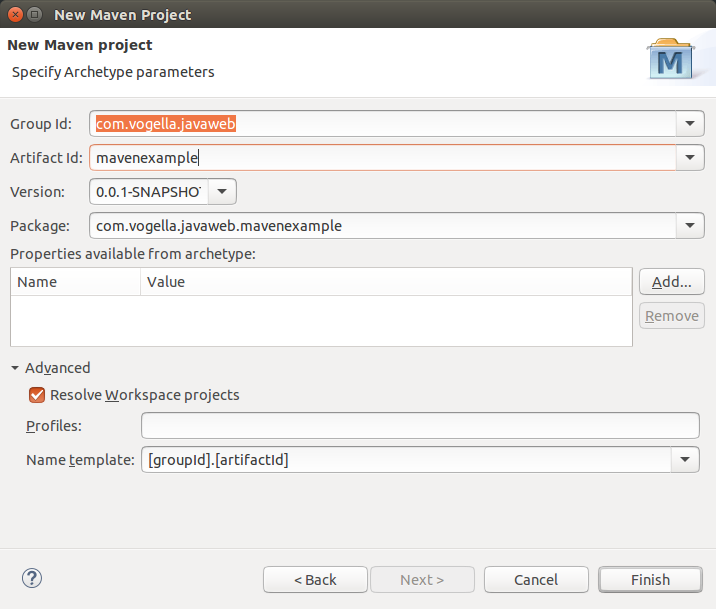
On the last tab enter the GAV of your project similar to the following screenshot.
3.2. Update projection to use Java
Modify the pom file of the generated projection to use Java 11. For this re-create the post-obit lawmaking onto the content via the pom.xml tab of the Maven editor.
<?xml version="1.0" encoding="UTF-eight"?> <project xmlns= "http://maven.apache.org/POM/iv.0.0" xmlns:xsi= "http://www.w3.org/2001/XMLSchema-case" xsi:schemaLocation= "http://maven.apache.org/POM/4.0.0 http://maven.apache.org/xsd/maven-four.0.0.xsd" > <modelVersion>4.0.0</modelVersion> <groupId>com.vogella</groupId> <artifactId>com.vogella.maven.eclipse</artifactId> <version>0.0.1-SNAPSHOT</version> <name>com.vogella.maven.eclipse</name> <url>http://www.vogella.com</url> <backdrop> <project.build.sourceEncoding>UTF-8</project.build.sourceEncoding> <maven.compiler.source>eleven</maven.compiler.source> <maven.compiler.target>11</maven.compiler.target> </properties> </project> iii.iii. Update Maven settings in Eclipse
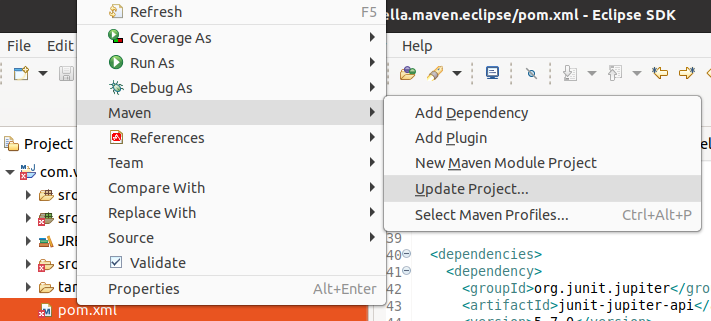
Right-click your projection and select and update your project.
3.4. Validate
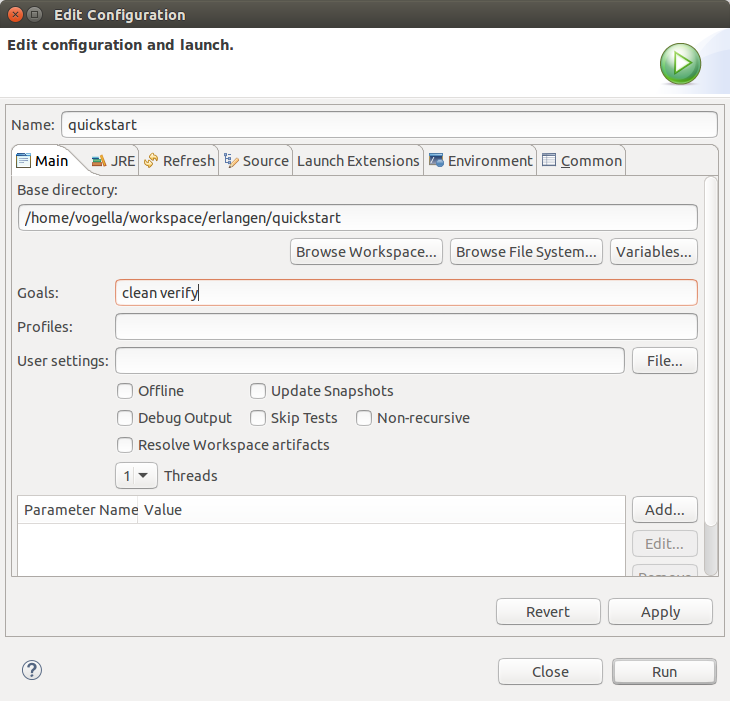
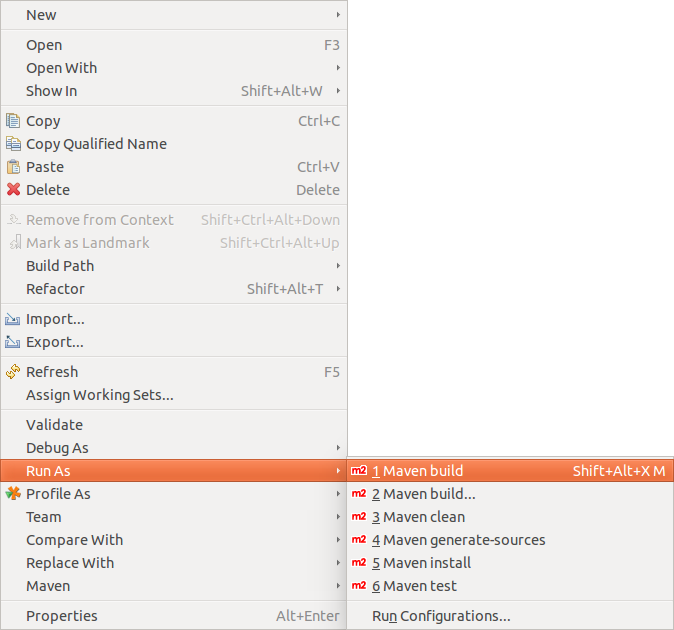
Validate that the Maven build is correctly configured by running the build. For this correct-click the pom.xml file and select .
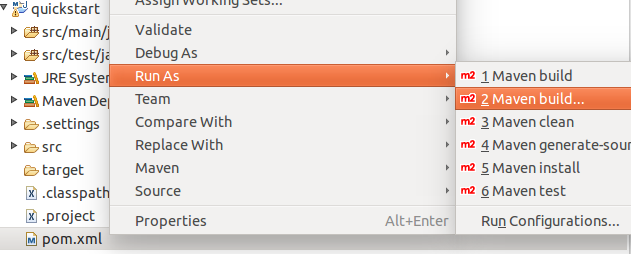
This opens a dialog which allows to define the parameters for the commencement. Enter make clean verify in the Goals: field and press the Run push button.
four. Do: Adjust generated projection to utilize JUnit5 and external libraries
In this exercise you suit your generated project to utilize JUnit5.
4.1. Change generated project
Alter the pom file of the generated project to utilize JUnit 5. For this copy the following code onto the content via the pom.xml tab of the Maven editor.
<?xml version="one.0" encoding="UTF-eight"?> <projection xmlns= "http://maven.apache.org/POM/four.0.0" xmlns:xsi= "http://www.w3.org/2001/XMLSchema-instance" xsi:schemaLocation= "http://maven.apache.org/POM/4.0.0 http://maven.apache.org/xsd/maven-iv.0.0.xsd" > <modelVersion>4.0.0</modelVersion> <groupId>com.vogella</groupId> <artifactId>com.vogella.maven.eclipse</artifactId> <version>0.0.1-SNAPSHOT</version> <name>com.vogella.maven.eclipse</proper noun> <url>http://www.vogella.com</url> <properties> <project.build.sourceEncoding>UTF-8</project.build.sourceEncoding> <maven.compiler.source>11</maven.compiler.source> <maven.compiler.target>xi</maven.compiler.target> </properties> (i) <build> <plugins> <plugin> <artifactId>maven-surefire-plugin</artifactId> <version>2.22.2</version> </plugin> <plugin> <artifactId>maven-failsafe-plugin</artifactId> <version>2.22.2</version> </plugin> </plugins> </build> (2) <dependencies> <dependency> <groupId>org.junit.jupiter</groupId> <artifactId>junit-jupiter-api</artifactId> <version>5.7.2</version> <telescopic>test</telescopic> </dependency> <dependency> <groupId>org.junit.jupiter</groupId> <artifactId>junit-jupiter-engine</artifactId> <version>v.seven.2</version> <scope>test</scope> </dependency> </dependencies> </project> 4.ii. Update Maven
Correct-click your project and select and update your project.
four.3. Update examination
Update your generated exam to JUnit 5 via the following:
package com.vogella.maven.eclipse ; import static org . junit . jupiter . api . Assertions . assertTrue ; import org.junit.jupiter.api.Test ; public form AppTest { @Examination public void shouldAnswerWithTrue () { assertTrue ( true ); } } 4.iv. Adding dependencies to your projection
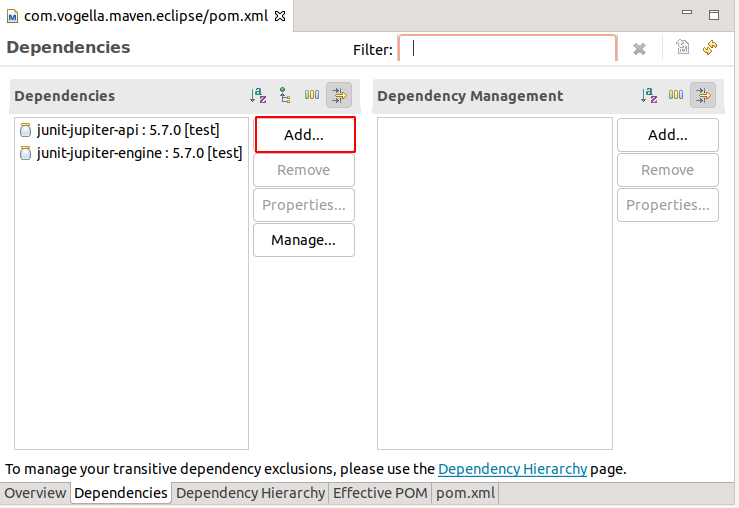
The Eclipse Maven tooling makes adding dependencies to the classpath of your projection elementary. In tin can directly add together information technology to your pom file, or use the Dependencies tab of the pom editor.
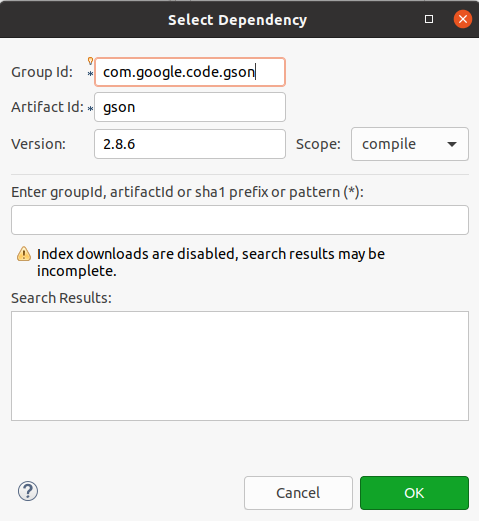
Switch to the Dependencies tab and press the Add push.
| If the Maven alphabetize was downloaded yous can as well search directly this dependency via the dialog. |
Correct-click your projection and select and update your projection.
4.v. Employ library
Alter or create the App.coffee class in your src/master/java folder. This classes uses Gson. As Maven added information technology to your classpath, information technology should compile and yous should be able to kickoff the course via Eclipse.
packet com.vogella.maven.lars ; import com.google.gson.Gson ; public class App { public static void main ( Cord [] args ) { Gson gson = new Gson (); System . out . println ( gson . toJson ( "Hello World!" ) ); } } four.6. Validate
Run the Maven build again and verify that the build runs successfully.
5. Exercise: Converting a Java project (create with Eclipse) to Maven
This exercise demonstrates how to convert a Java project to a Maven project.
5.1. Create Java project
Create a new Java project chosen com.vogella.build.maven.unproblematic in Eclipse.
Add one class called Main. This class should take a main method, which write "Howdy Maven!" to the control line.
packet com.vogella.build.maven.simple ; public form Main { public static void principal ( Cord [] args ) { System . out . println ( "Hi Maven!" ); } } 5.2. Convert to Maven project
Select your project, right-click on it and select .
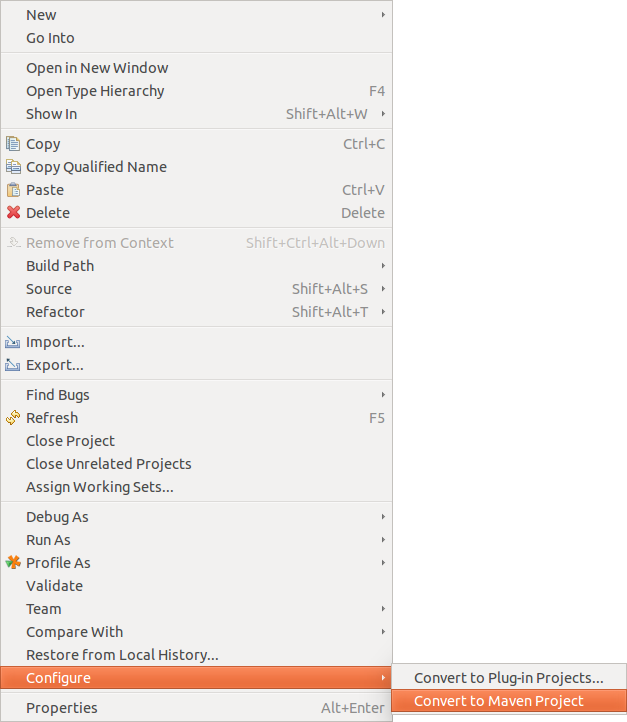
This creates a pom.xml file similar to the following.
<project xmlns= "http://maven.apache.org/POM/4.0.0" xmlns:xsi= "http://world wide web.w3.org/2001/XMLSchema-example" xsi:schemaLocation= "http://maven.apache.org/POM/4.0.0 http://maven.apache.org/xsd/maven-iv.0.0.xsd" > <modelVersion>4.0.0</modelVersion> <groupId>com.vogella.build.maven.elementary</groupId> <artifactId>com.vogella.build.maven.simple</artifactId> <version>0.0.ane-SNAPSHOT</version> <build> <sourceDirectory>src</sourceDirectory> <plugins> <plugin> <artifactId>maven-compiler-plugin</artifactId> <version>3.1</version> <configuration> <source>ane.8</source> <target>one.viii</target> </configuration> </plugin> </plugins> </build> </project> five.three. Execute the Maven build
Correct-click the pom.xml file and select .
Enter "clean install" as Goal.
| You have to enter the goals manually. The Select… button does non work, the dialog it displays is always empty. |
Press the Finish button. This starts the build, which you can follow in the Console view.
Once the build finishes, press F5 on the projection to refresh it. You lot see a target folder, which contains the build artifacts, e.g., a JAR file.
6. Exercise: Create a Java spider web project in Eclipse using Maven
This exercise demonstrates how to create a web application in Eclipse which uses Maven. It assumes that you accept already configured Eclipse for the creation of web applications.
6.one. Create Maven spider web project project
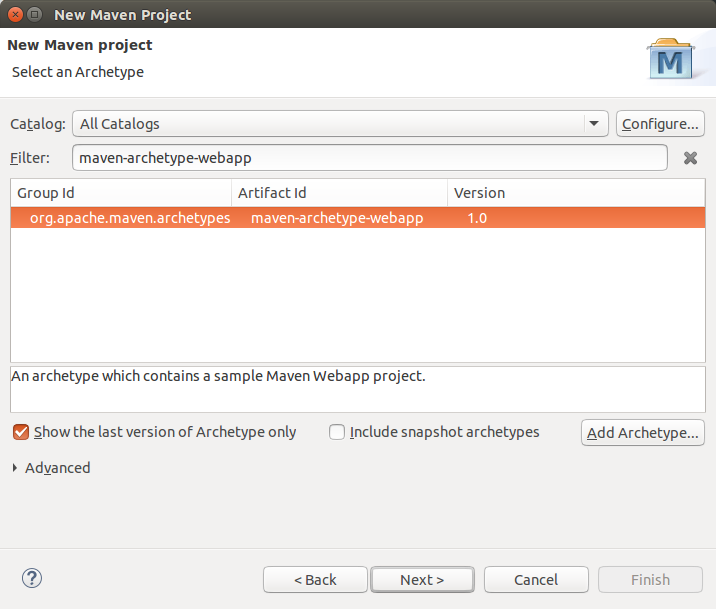
Create a new Maven project chosen com.vogella.javaweb.maven.first via the entry. On the archetype selection, select the maven-archetype-webapp entry and click the Next button.
Enter the group, artifact and version of your new Maven component.
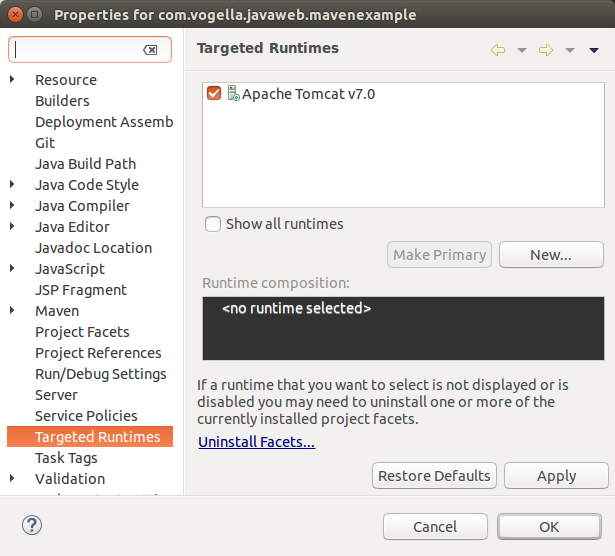
| You may run into the fault: The superclass "javax.servlet.http.HttpServlet" was not constitute on the Coffee Build Path. To fix this, right click on your project and select Properties. On the Targeted Runtimes select your web server entry, e.thou., Tomcat. |
6.2. Build your project
Run your mvn make clean verify build control from Eclipse. Validate that there are no issues with the build.
6.three. Run on the server
Right-click your project and select the menu entry.
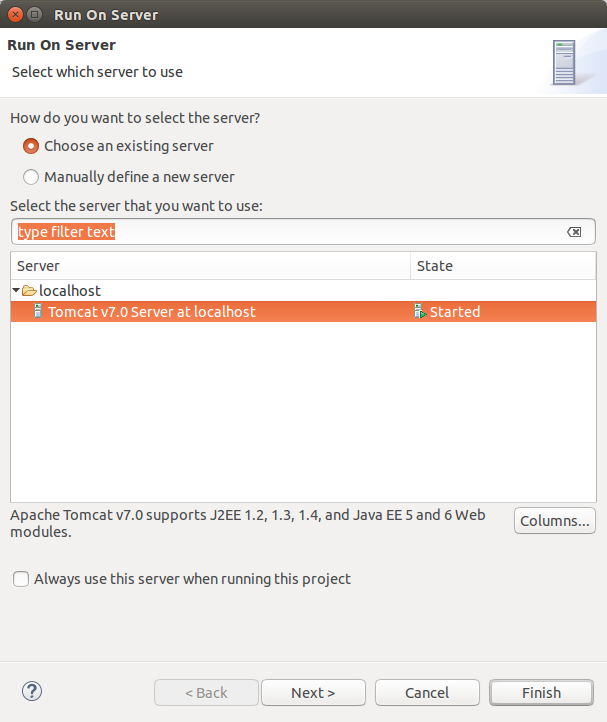
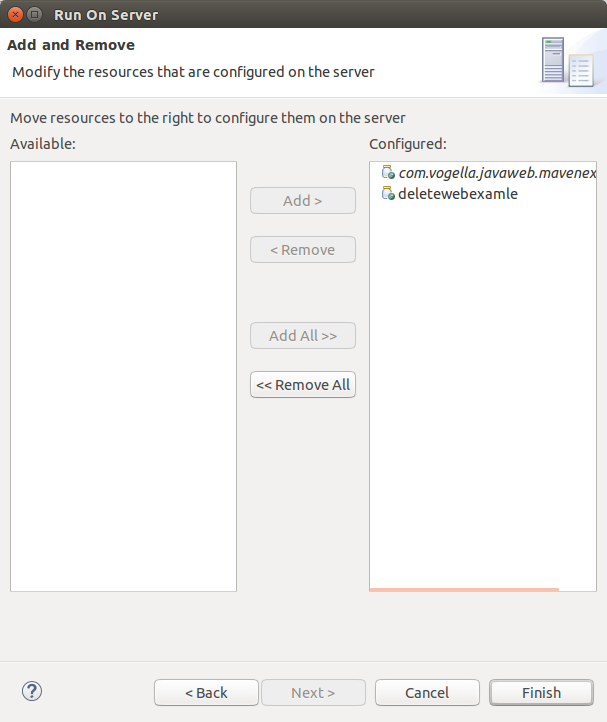
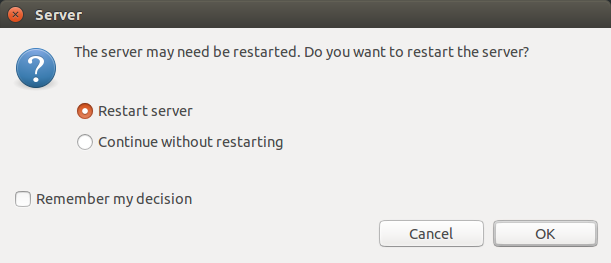
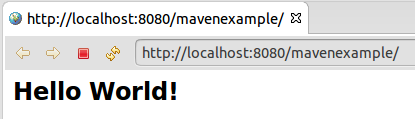
If yous open a browser you lot should be able to access your webapplication.
7. Exercise: Debug tests
Add a breakpoint in Eclipse in ane of your tests.
Start your Maven build on the commadline with the debug parameter.
mvn -Dmaven.surefire.debug exam This stop the command line build once the tests are executed and listen on port 5005 for a remote connection.
In Eclipse select the and create a new Remote Java Awarding run configuration.
image::maven-exam-debug10.png
Ensure to enter the correct project and the port 5005. Press the btn:Debug[] to connect to the running build. You can now debug your test.
viii. References for Webdevelopment with Eclipse
To use Maven in Eclipse for Coffee spider web evolution, yous should likewise install an configure the Eclipse web development tools (WTP). Encounter Eclipse Web Development Tools for a tutorial.

Source: https://www.vogella.com/tutorials/EclipseMaven/article.html
Posted by: mosleygrencir39.blogspot.com
0 Response to "How To Install Maven In Eclipse Mars"
Post a Comment